Turning Sublime Text Into a Lightweight Python IDE
A solid text editor is a developer’s best friend. Ideally, you use it constantly and it becomes like an extension of your hands. The keyboard commands you use daily become so engrained in your muscle memory that you stop thinking about them entirely.
With Sublime Text, it’s possible to turn your text editor into the functional equivalent of a Python IDE. The best part is you don’t have to install an IDE to do it.
Requirements
Here are my requirements for an ‘IDE’:
- It should provide excellent, configurable syntax colorization.
- It should allow for robust tab completion.
- It should offer the ability to jump to the definition of symbols in other files.
- It should perform automatic code linting to help avoid silly mistakes.
- It should be able to interact with a Python interpreter such that when debugging, the editor will follow along with the debugger.
Which Version?
Version 3 is the best available version. You should use it. Version 2 will be fine, but some of the plugins I recommend are not available for it. If you want the functionality they provide, you’ll have to find alternatives.
Basic Settings
All configuration in Sublime Text is done via JSON. You should already know the structure of JSON and how to write it. If you do not, go and read that link then return here.
There are a number of different levels of configuration in Sublime Text. You will most often work on settings at the user level.
Open Preferences -> Settings - Default to see all the default settings and choose which to override.
It is a very long list. Remember that defaults are often just fine.
Only change those settings you need to change.
Create your own set of preferences by opening Preferences -> Settings - User.
This will create an empty file.
You can then copy the settings you want to override from the default set into your personal settings.
Here’s a reasonable set of preliminary settings. Don’t just copy-and-paste them into your own settings file. Consider what each setting does, and write it into your settings file manually.
Please note that the color scheme, and theme listed are not available by default. You may want to install them using the sublime package manager, or you may wish to find your own. My favorite monospaced font Droid Sans Mono Slashed is also not installed on any machine by default. Any monospace font will do, but I really like that one. Please be sure that the font you choose for yourself is in fact a monospace font. This is vital when typing a whitespace sensitive language like Python.
{
    // NOTE THAT THE THEME, COLOR SCHEME AND FONT BELOW ARE NOT INSTALLED
    // ON ANY MACHINE BY DEFAULT
    "color_scheme": "Packages/User/Cobalt (SL).tmTheme",
    "theme": "Soda Light 3.sublime-theme",
    // A font face that helps distinguish between 0 (the number) and 'O' (the letter)
    // among other problem characters.
    "font_face": "DroidSansMonoSlashed",
    // getting older. I wonder if comfy font size increases as a linear
    //  function of age?
    "font_size": 15,
    "ignored_packages":
    [
        // I'm not a vi user, so this is of no use to me.
        "Vintage"
    ],
    "rulers":
    [
        // set text rulers so I can judge line length for pep8
        72, // docstrings
        79, // optimum code line length
        100  // maximum allowable length
    ],
    "word_wrap": false, // I hate auto-wrapped text.
    "wrap_width": 79, // This is used by a plugin elsewhere
    "tab_size": 4,
    "translate_tabs_to_spaces": true,
    "use_tab_stops": true
}
Especially important is the setting translate_tabs_to_spaces.
This ensures that any time you hit a tab key, the single \t character is replaced by four \s characters.
In Python this is vital!
Extending the Editor
Most of the requirements above go beyond basic editor function. Use Plugins.
Sublime Text comes with a great system for Package Control. It handles installing and uninstalling plugins, and even updates installed plugins for you. You can also manually install plugins that haven’t made it to the big-time yet, including ones you write yourself. Happily, the plugin system is Python!
Before you begin installing packages with package control, you must install the system itself. Do so by following the instructions here.
Once the system is installed, you can install a plugin.
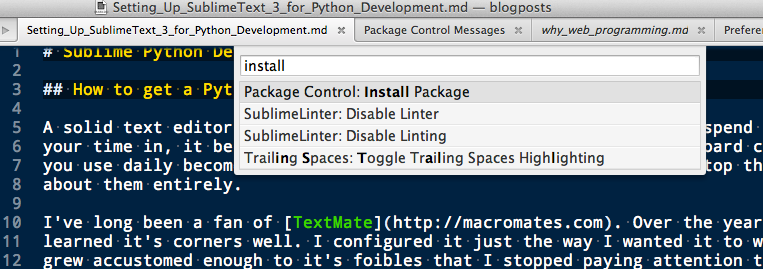
Open the command palette with shift-super-P (ctrl-shift-P on Windows/Linux).
The super key is command or ⌘ on OS X.
When the palette opens, typing install will bring up the Package Control: Install Package command.
Hit enter to select it.
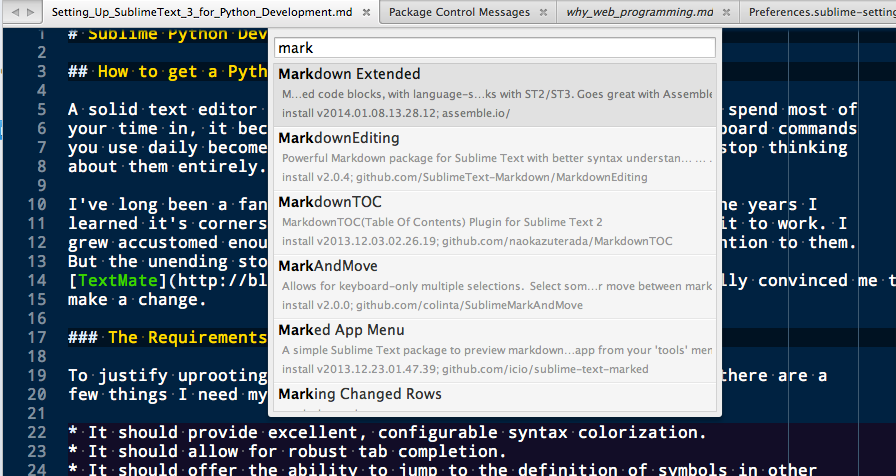
After you select the command, Sublime Text fetches an updated list of packages from the network.
It might take a second or two for the list to appear.
When it does, start to type the name of the package you want.
Sublime Text filters the list and shows you what you want to see.
To install a plugin, select it with the mouse, or use arrow keys to navigate the list.
Hit enter when your plugin is highlighted.
Useful Plugins
Here are the plugins I’ve installed to achieve the requirements above.
Autocompletion
By default, Sublime Text will index symbols in open files and projects. But that doesn’t cover installed python packages that may be part of a non-standard run environment.
There are two to choose good plugins to choose from:
- SublimeCodeIntel offers strong support for multiple languages through it’s own plugin system. It is a bit heavy and requires building an index.
- SublimeJedi only supports Python, but is faster and keeps an index on its own.
I’ve installed SublimeJedi.
Using it I can set up individual settings for my projects.
First, I use the Project menu to save project as....
I give my project a name (perhaps foo) and then save.
Once I’ve done so, I will have a foo.sublime-project file on disk.
This file can contain special settings that will apply to this project only.
Project settings will override more general settings like User preferences.
To allow SublimeJedi to see any package I install in the virtualenv for my project,
I can add the following settings to that file:
{
    "settings": {
        // ...
        "python_interpreter_path": "/Users/cewing/projects/foo_env/bin/python",

        "python_package_paths": [
            "/Users/cewing/projects/foo_env/lib/python-2.7/site-packages/"
        ]
    }
}
The python_interpreter_path allows me to indicate which Python executable should be introspected for symbol definitions.
The python_package_paths setting allows designating additional paths that will be searched for Python packages containing symbols.
By pointing this at the site-packages directory of my project virtualenv, I get autocompletion for any package I install in this project with pip.
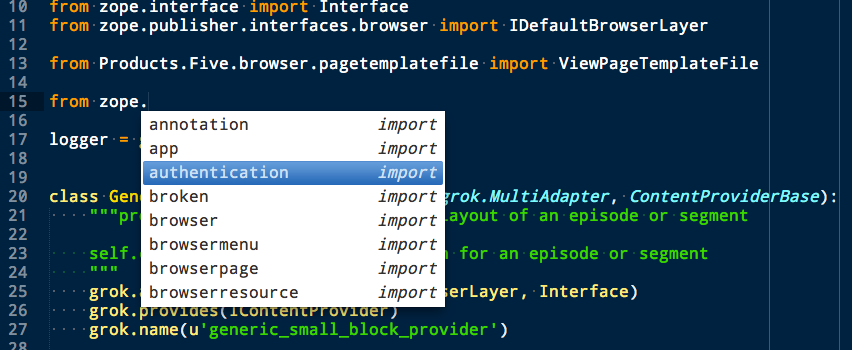
Once configured, you should be able to use the ctrl-shift-G keyboard shortcut to jump directly to the definition of a symbol.
You can also use alt-shift-F to find other usages of the same symbol elsewhere in your code.
Code Linting
Code linting shows you mistakes you’ve made in your source before you attempt to run the code. This saves time. Sublime Text has an available plugin for code linters called SublimeLinter.
Python has a couple of great tools available for linting, the pep8 and pyflakes packages.
Pep8 checks for style violations, lines too long, extra spaces and so on.
Pyflakes checks for syntactic violations, like using a symbol that isn’t defined or importing a symbol you don’t use.
Another Python linting package, flake8 combines these two, and adds in mccabe, a tool to check the cyclomatic complexity of code you write. This can be of great help in discovering methods and functions that could be refactored to be more simple.
There is a nice plugin for the SublimeLinter that utilizes flake8. For it to work, the plugin will need to have a Python executable that has the Python tools it needs installed.
Note
SublimeLinter and the flake8 plugin for it work best in Sublime Text 3. If you have a hard time getting them to work, consider trying the less-featureful but simpler package Python Flake8 Lint.
This same admonition applies if you have trouble getting SublimeLinter to work.
Use virtualenv to accomplish this. First, create a virtualenv and activate it:
$ cd /Users/cewing/virtualenvs
$ virtualenv sublenv
New python executable in sublenv/bin/python
Installing setuptools, pip...done.
$ source sublenv/bin/activate
(sublenv)$
Then use Python packaging tools to install the required packages:
(sublenv)$ pip install flake8
Downloading/unpacking flake8
[...]
Downloading/unpacking pyflakes>=0.7.3 (from flake8)
[...]
Downloading/unpacking pep8>=1.4.6 (from flake8)
[...]
Downloading/unpacking mccabe>=0.2.1 (from flake8)
[...]
Installing collected packages: flake8, pyflakes, pep8, mccabe
[...]
Successfully installed flake8 pyflakes pep8 mccabe
Cleaning up...
(sublenv)$
The Python executable for this virtualenv now has the required packages installed.
You can look in /path/to/sublenv/bin to see the executable commands for each:
(sublenv)$ ls sublenv/bin activate easy_install-2.7 pip2.7 activate.csh flake8 pyflakes activate.fish pep8 python activate_this.py pip python2 easy_install pip2 python2.7
Now install SublimeLinter and then SublimeLinter-flake8 using Package Control.
Here are settings you can add to Preferences -> Package Settings -> SublimeLinter -> Settings - User:
{
    //...
    "linters": {
        "flake8": {
            "@disable": false,
            "args": [],
            "builtins": "",
            "excludes": [],
            "ignore": "",
            "max-complexity": 10,
            "max-line-length": null,
            "select": ""
        }
    },
    //...
    "paths": {
        "linux": [],
        "osx": [
            "/Users/cewing/virtualenvs/sublenv/bin"
        ],
        "windows": []
    },
    "python_paths": {
        "linux": [],
        "osx": [
            "/Users/cewing/virtualenvs/sublenv/bin"
        ],
        "windows": []
    },
    //...
}
The paths key points to the path that contains the flake8 executable command.
The python_paths key points to the location of the python executable to be used.
In both cases, you will want to provide values in the appropriate place for the OS you are using.
The settings inside the flake8 object control the performance of the linter.
Read more about them here.
In particular, you can use "excludes" to control which linting errors you want to ignore.
This can be very helpful in quieting the less important errors.
If you’re curious, here’s a list of error codes:.
White Space Management
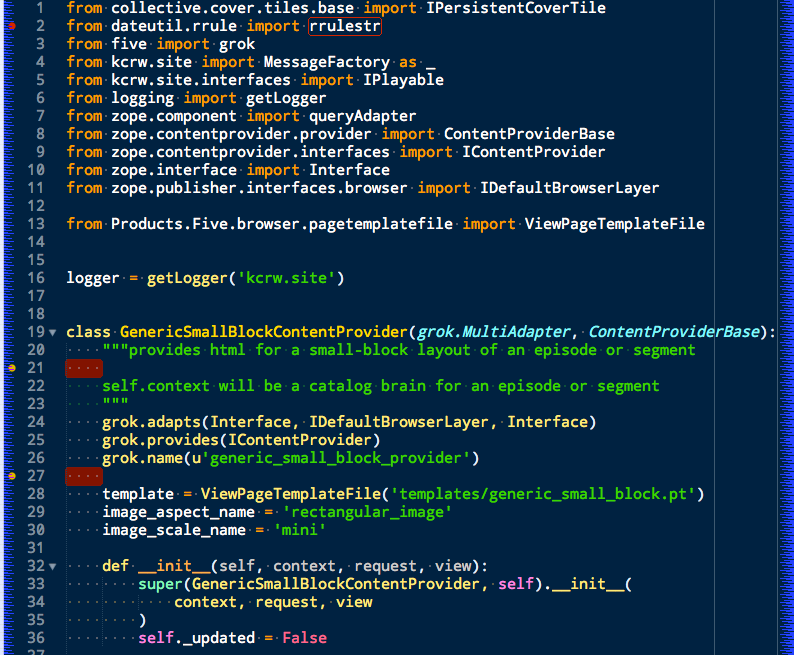
One of the issues highlighted by flake8 is trailing spaces.
Sublime text provides a setting that allows you to remove them every time you save a file:
source

{
    "trim_trailing_whitespace_on_save": true
}
Do not use this setting
Removing trailing whitespace by default causes a ton of noise in commits.
You should keep commits for stylistic cleanup separate from those that make important changes to code. The TrailingSpaces SublimeText plugin can help with this.
Here are the settings you can use:
{
    //...
    "trailing_spaces_modified_lines_only": true,
    "trailing_spaces_trim_on_save": true,
    // ...
}
This allows trimming whitespace on save, but only on lines you have directly modified. You can still trim all whitespace manually and keep changesets free of noise.
Follow-Along
The final requirement for a reasonable IDE experience is to be able to follow a debugging session in the file where the code exists.
There is no plugin for SublimeText that supports this. But there is a Python package you can install into the virtualenv for each of your projects that does it.
The package is called PDBSublimeTextSupport and its simple to install with pip:
(projectenv)$ pip install PDBSublimeTextSupport
Once the plugin is installed you have one more step to take.
You must configure the Python debugger to communicate with your editor.
Add a file called .pdbrc to your home directory.
In that file, type the following Python code:
from PdbSublimeTextSupport import preloop, precmd
pdb.Pdb.preloop = preloop
pdb.Pdb.precmd = precmd
Note
You can also place a .pdbrc file in your project where you interact with the command line.
Python will read the one from your home directory first, if present.
If there is one in your current working directory, that will override the one in your home directory.
Now, whenever you set a breakpoint in your code and it is hit, your editor will open. You’ll see your cursor on the line of code where your debugger is. As you step through the code, you will see the current line in your Sublime Text file move along with you. It will even follow you to other files if you step into functions that are called.