An Introduction To Django
In this tutorial, you’ll walk through creating a very simple microblog application using Django.
Practice Safe Development
We’ll install Django and any other packages we use with it in a virtualenv.
This will ensure that it is isolated from everything else we do in class (and vice versa)
Remember the basic format for creating a virtualenv:
$ python -m venv [options] <ENV>
<or>
$ pyvenv [options] <ENV>
Set Up a VirtualEnv
Start by creating your virtualenv:
$ python -m venv djangoenv
<or>
$ pyvenv djangoenv
...
Then, activate it:
$ source djangoenv/bin/activate
<or>
C:\> djangoenv\Scripts\activate.bat
Install Django
Finally, install Django 1.7.4 using pip:
(djangoenv)$ pip install Django==1.9
Collecting Django==1.9
  Downloading Django-1.9-py2.py3-none-any.whl (6.6MB)
    100% |████████████████████████████████| 6.6MB 47kB/s
Installing collected packages: Django
Successfully installed Django-1.9
(djangoenv)$
Our Project
Everything in Django stems from the project. To get started learning, we’ll
create one. We’ll use a script installed by Django, django-admin.py:
(djangoenv)$ django-admin startproject mysite
If you’re on windows, that command is slightly different:
django-admin.exe startproject mysite
Note
If you run into trouble at this stage, please consult the installation documentation. For windows users, see also this guide to installation on Windows
This will create a folder called ‘mysite’. The folder contains the following structure:
mysite
├── manage.py
└── mysite
    ├── __init__.py
    ├── settings.py
    ├── urls.py
    └── wsgi.py
If what you see doesn’t match that, you’re using an older version of Django. Make sure you’ve installed 1.7.4
What Got Created
- outer *mysite* folder: this is just a container and can be renamed or moved at will
- inner *mysite* folder: this is your project directory. It should not be renamed.
- __init__.py: magic file that makes mysite a python package.
- settings.py: file which holds configuration for your project, more soon.
- urls.py: file which holds top-level URL configuration for your project, more soon.
- wsgi.py: binds a wsgi application created from your project to the
symbol
application - manage.py: a management control script.
django-admin provides a hook for administrative tasks and abilities:
- creating a new project or app
- running the development server
- executing tests
- entering a python interpreter
- entering a database shell session with your database
- much much more (run
django-adminwithout an argument)
manage.py wraps this functionality, adding the full environment of your project.
How manage.py Works
Look in the manage.py script Django created for you. You’ll see this:
#!/usr/bin/env python
import os
import sys

if __name__ == "__main__":
    os.environ.setdefault("DJANGO_SETTINGS_MODULE", "mysite.settings")

    from django.core.management import execute_from_command_line

    execute_from_command_line(sys.argv)
The environmental var DJANGO_SETTINGS_MODULE is how the manage.py
script is made aware of your project’s environment. This is why you shouldn’t
rename the project package.
Development Server
At this point, you should be ready to use the development server:
(djangoenv)$ cd mysite
(djangoenv)$ ./manage.py runserver
...
You’ll see a scary warning about unapplied migrations. Ignore it for a moment.
Instead, load http://localhost:8000 in your browser. You should see this:
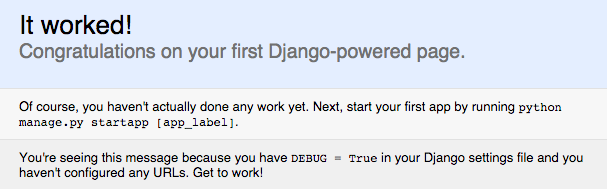
Do you?
Connecting A Database
Django supplies its own ORM (Object-Relational Mapper). This ORM sits on top of the DB-API implementation you choose. You must provide connection information through Django configuration.
All Django configuration takes place in settings.py in your project
folder.
Edit your settings.py to match:
DATABASES = {
    'default': {
        'ENGINE': 'django.db.backends.sqlite3',
        'NAME': 'mysite.db',
    }
}
There are other database settings, but they are not used with sqlite3, we’ll ignore them for now.
Django’s ORM provides a layer of abstraction between you and SQL. You write Python classes called models describing the objects that make up your system. The ORM handles converting data from these objects into SQL statements (and back). We’ll learn much more about this in a bit.
The final step in preparing to work is to set up the database. You do this by running migrations. These migrations create the tables needed to support the models that are required by Django out of the box.
Run the following command:
(djangoenv)$ ./manage.py migrate
Operations to perform:
  Apply all migrations: admin, contenttypes, auth, sessions
Running migrations:
  Applying contenttypes.0001_initial... OK
  Applying auth.0001_initial... OK
  Applying admin.0001_initial... OK
  Applying sessions.0001_initial... OK
Great! Now we can set up an initial user who’ll be able to do anything, a
superuser. Again, we’ll use manage.py:
(djangoenv)$ ./manage.py createsuperuser
Username (leave blank to use 'cewing'):
Email address: cris@crisewing.com
Password:
Password (again):
Superuser created successfully.
Notice that as you type your password, it will not appear on the screen. Don’t worry, it’s actually being recorded. You just can’t see it (and neither can that snoopy git looking over your shoulder).
Projects and Apps
We’ve created a Django project. In Django a project represents a whole website:
- global configuration settings
- inclusion points for additional functionality
- master list of URL endpoints
A Django app encapsulates a unit of functionality:
- A blog section
- A discussion forum
- A content tagging system
Important
One project can (and likely will) consist of many apps
Django already includes some apps for you.
They’re in settings.py in the INSTALLED_APPS setting:
INSTALLED_APPS = (
    'django.contrib.admin',
    'django.contrib.auth',
    'django.contrib.contenttypes',
    'django.contrib.sessions',
    'django.contrib.messages',
    'django.contrib.staticfiles',
)
Our Class App
We are going to build an app to add to our project. To start with our app will be a simple blog. As stated above, an app represents a unit within a system, the project. We have a project, we need to create an app
This is accomplished using manage.py. In your terminal, make sure you are
in the outer mysite directory, where the file manage.py is located.
Then:
(djangoenv)$ ./manage.py startapp myblog
This should leave you with the following structure:
-
class
small
mysite
├── db.sqlite3
├── manage.py
├── myblog
│   ├── __init__.py
│   ├── admin.py
│   ├── migrations
│   │   └── __init__.py
│   ├── models.py
│   ├── tests.py
│   └── views.py
└── mysite
    ├── __init__.py
    ├── settings.py
    ├── urls.py
    └── wsgi.py
Like our Pyramid site, Django divides up functionality by module. You’ll create
ORM model classes in the models.py file, view code in the views.py
file, and so on.
We’ll start by defining the main Python class for our blog system, a Post.
Django Models
Any Python class in Django that is meant to be persisted must inherit from
the Django Model class. This base class hooks in to the ORM functionality
converting Python code to SQL. You can override methods from the base Model
class to alter how this works or write new methods to add functionality.
Learn more about models
Our Post Model
Open the models.py file created in our myblog package. Add the
following:
from django.db import models #<-- This is already in the file
from django.contrib.auth.models import User

class Post(models.Model):
    title = models.CharField(max_length=128)
    text = models.TextField(blank=True)
    author = models.ForeignKey(User)
    created_date = models.DateTimeField(auto_now_add=True)
    modified_date = models.DateTimeField(auto_now=True)
    published_date = models.DateTimeField(blank=True, null=True)
This code defines a subclass of the Django Model class and added a bunch of
attributes.
- These attributes are all instances of
Fieldclasses defined in Django - Field attributes on a model map to columns in a database table
- The arguments you provide to each Field customize how it works
- This means both how it operates in Django and how it is defined in SQL
- There are arguments shared by all Field types
- There are also arguments specific to individual types
You can read much more about Model Fields and options
There are some features of our fields worth mentioning in specific. Notice we have no field that is designated as the primary key
- You can make a field the primary key by adding
primary_key=Truein the arguments - If you do not, Django will automatically create one. This field is always
called
id - No matter what the primary key field is called, its value is always
available on a model instance as the
pkattribute:instance.pk
Field Details
title = models.CharField(max_length=128)
- The required
max_lengthargument is specific toCharFieldfields. - It affects both the Python and SQL behavior of a field.
- In python, it is used to validate supplied values during model validation
- In SQL it is used in the column definition:
VARCHAR(128)
author = models.ForeignKey(User)
- Django also models SQL relationships as specific field types.
- The required positional argument is the class of the related Model.
- By default, the reverse relation is implemented as the attribute
<fieldname>_set. - You can override this by providing the
related_nameargument.
created_date = models.DateTimeField(auto_now_add=True)
modified_date = models.DateTimeField(auto_now=True)
auto_now_addis available on all date and time fields. It sets the value of the field to now when an instance is first saved.auto_nowis similar, but sets the value anew each time an instance is saved.- Setting either of these will cause the
editableattribute of a field to be set toFalse. - This does not mean you can’t update these values, only that they will not show in forms by default.
text = models.TextField(blank=True)
# ...
published_date = models.DateTimeField(blank=True, null=True)
- The argument
blankis shared across all field types. The default isFalse - This argument affects only the Python behavior of a field, determining if the field is required
- The related
nullargument affects the SQL definition of a field: is the column NULL or NOT NULL - Django recommends that you not use the
nulloption for text fields. It will automatically insert an empty string into the database if the field is left blank.
Installing Apps
In order to use our new model, we need Django to know about our app. This is
accomplished by configuration in the settings.py file. Open that file now,
in your editor, and find the INSTALLED_APPS setting.
You extend Django functionality by installing apps. This is pretty simple:
INSTALLED_APPS = (
    'django.contrib.admin',
    'django.contrib.auth',
    'django.contrib.contenttypes',
    'django.contrib.sessions',
    'django.contrib.messages',
    'django.contrib.staticfiles',
    'myblog', # <- YOU ADD THIS PART
)
Once Django is made aware of the existence of this new app, it can make a new migration that will set up the tables for this new class automatically.
(djangoenv)$ ./manage.py makemigrations myblog
Migrations for 'myblog':
  0001_initial.py:
    - Create model Post
And now you can run that migration to make the changes to your database:
(djangoenv)$ ./manage.py migrate
Operations to perform:
  Apply all migrations: sessions, myblog, contenttypes, auth, admin
Running migrations:
  Rendering model states... DONE
  Applying myblog.0001_initial... OK
The Django Shell
Django provides a management command shell:
- Shares the same
sys.pathas your project, so all installed python packages are present. - Imports the
settings.pyfile from your project, and so shares all installed apps and other settings. - Handles connections to your database, so you can interact with live data directly.
The Django shell will use more advanced Python interpreters such as
iPython if they are available. Let’s go ahead and install iPython in our
djangoenv to get this advantage:
(djangoenv)$ pip install ipython
...
Let’s explore the Model Instance API directly using this shell:
(djangoenv)$ ./manage.py shell
Instances of our model can be created by simple instantiation:
In [1]: from myblog.models import Post
In [2]: p1 = Post(title='My First Post',
   ...:           text='This is the first post I\'ve written')
In [3]: p1
Out[3]: <Post: Post object>
We can also validate that our new object is okay before we try to save it:
In [4]: p1.full_clean()
...

ValidationError: {'author': ['This field cannot be null.']}
Django Model Managers
We have to hook our Post to an author, which must be a User. To do
this, we need to have an instance of the User class. We can use the
User model manager to run table-level operations like SELECT.
All Django models have a manager. By default it is accessed through the
objects class attribute.
Let’s use the manager to get an instance of the User class:
In [5]: from django.contrib.auth.models import User
In [6]: all_users = User.objects.all()
In [7]: all_users
Out[7]: [<User: cewing>]
In [8]: p1.author = all_users[0]
And now our instance should validate properly:
In [9]: p1.full_clean()
In [10]:
Saving New Objects
Our model has three date fields, two of which are supposed to be auto-populated:
In [11]: print(p1.created_date)
None
In [12]: print(p1.modified_date)
None
Although we’ve instantiated a Post object, it doesn’t have these values yet. That’s because a model is not created until it’s saved into the database. When we save our post, these fields will get values assigned:
In [13]: p1.save()
In [14]: print(p1.created_date)
2015-12-31 19:24:29.019293+00:00
In [15]: print(p1.modified_date)
2015-12-31 19:24:29.019532+00:00
Updating An Instance
Models operate much like ‘normal’ python objects. To change the value of a
field, simply set the instance attribute to a new value. Call save() to
persist the change:
In [16]: p1.title = p1.title + " (updated)"
In [17]: p1.save()
In [18]: p1.title
Out[18]: 'My First Post (updated)'
Create a Few Posts
Let’s create a few more posts so we can explore the Django model manager query API:
In [20]: p2 = Post(title="Another post",
   ....:           text="The second one created",
   ....:           author=all_users[0]).save()
In [21]: p3 = Post(title="The third one",
   ....:           text="With the word 'heffalump'",
   ....:           author=all_users[0]).save()
In [22]: p4 = Post(title="Posters are a great decoration",
   ....:           text="When you are a poor college student",
   ....:           author=all_users[0]).save()
   ....: Post.objects.count()
Out[22]: 4
The Django Query API
The manager on each model class supports a full-featured query API. API methods take keyword arguments, where the keywords are special constructions combining field names with field lookups. The double-underscore character separates the name of a field from the lookup value.
- title__exact=”The exact title”
- text__contains=”decoration”
- id__in=range(1,4)
- published_date__lte=datetime.datetime.now()
Each keyword argument adds to the query that will be used to find matching objects.
QuerySets
A QuerySet is a special type of object that maintains a relationship to the
database. Query API methods can be divided into two basic groups: methods that
return QuerySets and those that do not.
The former may be chained without hitting the database:
In [24]: a = Post.objects.all()  #<-- no query yet
In [25]: b = a.filter(title__icontains="post")  #<- not yet
In [26]: c = b.exclude(text__contains="created")  #<-- nope
In [27]: [(p.title, p.text) for p in c]  #<-- This will issue the query
Out[27]:
[('My First Post (updated)', "This is the first post I've written"),
 ('Posters are a great decoration', 'When you are a poor college student')]
Conversely, the latter will issue an SQL query when executed.
In [28]: a.count()  #<-- immediately executes an SQL query
Out[28]: 4
QuerySets and SQL
If you are curious, you can see the SQL that a given QuerySet will use:
In [29]: print(c.query)
SELECT "myblog_post"."id", "myblog_post"."title", "myblog_post"."text",
       "myblog_post"."author_id", "myblog_post"."created_date",
       "myblog_post"."modified_date", "myblog_post"."published_date"
FROM "myblog_post"
WHERE (
    "myblog_post"."title" LIKE %post% ESCAPE '\'
    AND NOT ("myblog_post"."text" LIKE %created% ESCAPE '\')
)
The SQL will vary depending on which DBAPI backend you use (yay ORM!!!)
Note
Incidentally, using this as a way to learn SQL is not a bad idea.
Exploring the QuerySet API
See https://docs.djangoproject.com/en/1.9/ref/models/querysets
In [3]: [p.pk for p in Post.objects.all().order_by('created_date')]
Out[3]: [1, 2, 3, 4]
In [4]: [p.pk for p in Post.objects.all().order_by('-created_date')]
Out[4]: [4, 3, 2, 1]
In [5]: [p.pk for p in Post.objects.filter(title__contains='post')]
Out[5]: [1, 2, 4]
In [6]: [p.pk for p in Post.objects.exclude(title__contains='post')]
Out[6]: [3]
In [7]: qs = Post.objects.exclude(title__contains='post')
In [8]: qs = qs.exclude(id__exact=3)
In [9]: [p.pk for p in qs]
Out[9]: []
In [10]: qs = Post.objects.exclude(title__contains='post', id__exact=3)
In [11]: [p.pk for p in qs]
Out[11]: [1, 2, 3, 4]
Do all of those make sense to you? Especially consider the difference between those last two results? Can you explain that?
Updating via QuerySets
You can update all the objects in a QuerySet at the same time. Changes are persisted
without calling the save instance method:
In [12]: qs = Post.objects.all()
In [13]: [p.published_date for p in qs]
Out[13]: [None, None, None, None]
In [14]: from datetime import datetime
In [15]: from django.utils.timezone import UTC
In [16]: utc = UTC()
In [17]: now = datetime.now(utc)
In [18]: qs.update(published_date=now)
Out[18]: 4
In [19]: [p.published_date for p in qs]
Out[19]:
[datetime.datetime(2015, 12, 31, 19, 50, 4, 99980, tzinfo=<UTC>),
 datetime.datetime(2015, 12, 31, 19, 50, 4, 99980, tzinfo=<UTC>),
 datetime.datetime(2015, 12, 31, 19, 50, 4, 99980, tzinfo=<UTC>),
 datetime.datetime(2015, 12, 31, 19, 50, 4, 99980, tzinfo=<UTC>)]
Testing Our Model
As with any project, we want to test our work. Django provides a testing
framework to allow this. Django supports both unit tests and doctests. I
strongly suggest using unit tests. You add tests for your app to the file
tests.py, which should be at the same package level as models.py.
Locate and open this file in your editor.
Django TestCase Classes
SimpleTestCase is for basic unit testing with no ORM requirements
TransactionTestCase is useful if you need to test transactional actions (commit and rollback) in the ORM
TestCase is used when you require ORM access and a test client
LiveServerTestCase launches the django server during test runs for front-end acceptance tests.
Sometimes testing requires base data to be present. We need a User for ours.
Django provides fixtures to handle this need. Create a directory called
fixtures inside your myblog app directory. This new folder should be
adjacent to the tests.py file.
Copy the file myblog_test_fixture.json from the resources/session08
into this directory, it contains users for our tests.
Now that we have a fixture, we need to instruct our tests to use it.
Edit tests.py to look like this:
from django.test import TestCase
from django.contrib.auth.models import User

class PostTestCase(TestCase):
    fixtures = ['myblog_test_fixture.json', ]

    def setUp(self):
        self.user = User.objects.get(pk=1)
Our First Enhancement
Look at the way our Post represents itself in the Django shell:
In [2]: [p for p in Post.objects.all()]
Out[2]:
[<Post: Post object>,
 <Post: Post object>,
 <Post: Post object>,
 <Post: Post object>]
Wouldn’t it be nice if the posts showed their titles instead? In Django, the
__str__ method is used to determine how a Model instance represents
itself. Then, calling str(instance) gives the desired result.
Let’s write a test that demonstrates our desired outcome:
# add this import at the top
from myblog.models import Post

# and this test method to the PostTestCase
def test_string_representation(self):
    expected = "This is a title"
    p1 = Post(title=expected)
    actual = str(p1)
    self.assertEqual(expected, actual)
To run tests, use the test management command. Without arguments, it will
run all TestCases it finds in all installed apps. You can pass the name of a
single app to focus on those tests.
Quit your Django shell and in your terminal run the test we wrote:
(djangoenv)$ ./manage.py test myblog
We have yet to implement this enhancement, so our test should fail:
Creating test database for alias 'default'...
F
======================================================================
FAIL: test_string_representation (myblog.tests.PostTestCase)
----------------------------------------------------------------------
Traceback (most recent call last):
  File "/Users/cewing/projects/training/uw_pce/training.python_web/scripts/session07/mysite/myblog/tests.py", line 15, in test_string_representation
    self.assertEqual(expected, actual)
AssertionError: 'This is a title' != u'Post object'

----------------------------------------------------------------------
Ran 1 test in 0.007s

FAILED (failures=1)
Destroying test database for alias 'default'...
Let’s add an appropriate __str__ method to our Post class.
- It will take
selfas its only argument - And it should return its own title as the result
- Go ahead and take a stab at this in
models.py
class Post(models.Model):
    #...

    def __str__(self):
        return self.title
Re-run the tests to see if that worked:
(djangoenv)$ ./manage.py test myblog
Creating test database for alias 'default'...
.
----------------------------------------------------------------------
Ran 1 test in 0.007s

OK
Destroying test database for alias 'default'...
YIPEEEE!
What to Test
In any framework, the question arises of what to test. Much of your app’s functionality is provided by framework tools. Does that need testing? I usually don’t write tests covering features provided directly by the framework. I do write tests for functionality I add, and for places where I make changes to how the default functionality works. This is largely a matter of style and taste (and of budget).
We’ve only begun to test our blog app. We’ll be adding many more tests later. In between, you might want to take a look at the Django testing documentation:
The Django Admin
There are some who believe that Django has been Python’s killer app. And without doubt the Django Admin is a killer feature for Django. To demonstrate this, we are going to set up the admin for our blog
The Django Admin is, itself, an app, installed by default (as of 1.6). Open
the settings.py file from our mysite project package and verify that
you see it in the list:
INSTALLED_APPS = (
    'django.contrib.admin', # <- already present
    # ...
)
What we need now is to allow the admin to be seen through a web browser. To do that, we’ll have to add some URLs to our project.
Django URL Resolution
Like Pyramid, Django has a system for dispatching requests to code: the urlconf.
- A urlconf is an iterable of calls to the
django.conf.urls.urlfunction - This function takes:
- a regexp rule, representing the URL
- a
callableto be invoked (or a name identifying one) - an optional name kwarg, used to reverse the URL
- other optional arguments we will skip for now
- The function returns a resolver that matches the request path to the callable
I said above that a urlconf is an iterable. That iterable is generally built by
calling the django.conf.urls.patterns function. It’s best to build it that
way, but in reality, any iterable will do.
However, the name you give this iterable is not flexible. Django will load
the urlconf named urlpatterns that it finds in the file named in
settings.ROOT_URLCONF.
Many Django add-on apps, like the Django Admin, come with their own urlconf. It is standard to include these urlconfs by rooting them at some path in your site.
You can do this by using the django.conf.urls.include function as the
callable in a url call:
url(r'^forum/', include('random.forum.app.urls'))
Including the Admin
We can use this to add all the URLs provided by the Django admin in one stroke.
verify the following lines in
urls.py:from django.contrib import admin # <- should be present already urlpatterns = [ ... url(r'^admin/', include(admin.site.urls)), #<- this should be too ]
We can now view the admin. We’ll use the Django development server.
In your terminal, use the runserver management command to start the
development server:
(djangoenv)$ ./manage.py runserver
Validating models...

0 errors found
Django version 1.4.3, using settings 'mysite.settings'
Development server is running at http://127.0.0.1:8000/
Quit the server with CONTROL-C.
Viewing the Admin
Load http://localhost:8000/admin/. You should see this:
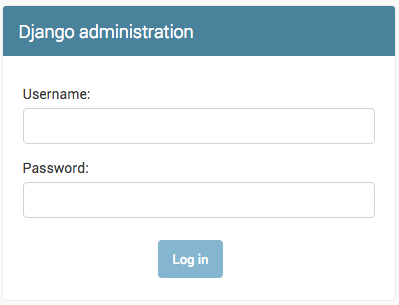
Login with the name and password you created before.
The Admin Index
The index will provide a list of all the installed apps and each model registered. You should see this:
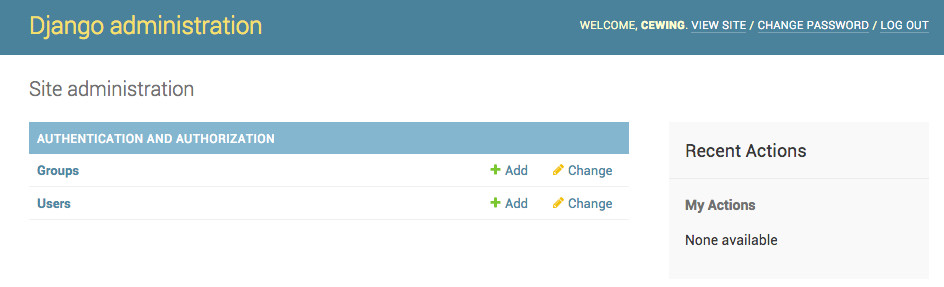
Click on Users. Find yourself? Edit yourself, but don’t uncheck
superuser.
Add Posts to the Admin
Okay, let’s add our app model to the admin. Find the admin.py file in the
myblog package. Open it, add the following and save the file:
from django.contrib import admin # <- this is already there.
from myblog.models import Post

admin.site.register(Post)
Reload the admin index page in your browser. You should now see a listing for the Myblog app, and an entry for Posts.
Visit the admin page for Posts. You should see the posts we created earlier in
the Django shell. Look at the listing of Posts. Because of our __str__
method we see a nice title.
Are there other fields you’d like to see listed? Click on a Post, note what is and is not shown.
Next Steps
We’ve learned a great deal about Django’s ORM and Models. We’ve also spent some time getting to know the Query API provided by model managers and QuerySets.
We’ve also hooked up the Django Admin and noted some shortcomings.
In class we’ll learn how to put a front end on this, add new models, and customize the admin experience.