Session 06
Interacting with Data
Wherein we learn to display our data, and to create and edit it too!
But First
Last week we discussed the model part of the MVC application design pattern.
We set up a project using the Pyramid web framework and the SQLAlchemy library for persisting our data to a database.
We looked at how to define a simple model by investigating the demo model created on our behalf.
And we went over, briefly, the way we can interact with this model at the command line to make sure we’ve got it right.
Finally, we defined what attributes a learning journal entry would have, and a pair of methods we think we will need to make the model complete.
Our Data Model
Over the last week, your assignment was to create the new model.
Did you get that done?
If not, what stopped you?
Let’s take a few minutes here to answer questions about this task so you are more comfortable.
Questions?
I’ve added a working models.py file to our class repository in the
resources/session06/ folder.
Let’s review how it works.
I’ve also made a few small changes to make the pshell command a bit more
helpful.
In learning_journal/__init__.py I added the following function:
def create_session(settings):
    from sqlalchemy.orm import sessionmaker
    engine = engine_from_config(settings, 'sqlalchemy.')
    Session = sessionmaker(bind=engine)
    return Session()
Then, in development.ini I added the following configuration:
[pshell]
create_session = learning_journal.create_session
entry = learning_journal.models.Entry
Here’s a demo interaction using pshell with these new features:
First cd to your project code, fire up your project virtualenv and
start python:
$ cd projects/learning-journal/learning_journal
$ source ../ljenv/bin/activate
(ljenv)$ pshell development.ini
Python 3.5.0 (default, Sep 16 2015, 10:42:55)
...
Environment:
  app          The WSGI application.
  ...
Custom Variables:
  create_session learning_journal.create_session
  entry        learning_journal.models.Entry

In [1]: session = create_session(registry.settings)
[demo]
The MVC Controller
Let’s go back to thinking for a bit about the Model-View-Controller pattern.

By Alan Evangelista (Own work) [CC0], via Wikimedia Commons
We talked last week (and today) about the model
Today, we’ll dig into controllers and views
or as we will know them in Pyramid: views and renderers
HTTP Request/Response
Internet software is driven by the HTTP Request/Response cycle.
A client (perhaps a user with a web browser) makes a request
A server receives and handles that request and returns a response
The client receives the response and views it, perhaps making a new request
And around and around it goes.
An HTTP request arrives at a server through the magic of a URL
http://uwpce-pythoncert.github.io/training.python_web/html/index.html
Let’s break that up into its constituent parts:
- http://:
- This part is the protocol, it determines how the request will be sent
- uwpce-pythoncert.github.io:
- This is a domain name. It’s the human-facing address for a server somewhere.
- /training.python_web/html/index.html:
- This part is the path. It serves as a locator for a resource on the server
In a static website (like our documentation) the path identifies a physical location in the server’s filesystem.
Some directory on the server is the home for the web process, and the path is looked up there.
Whatever resource (a file, an image, whatever) is located there is returned to the user as a response.
If the path leads to a location that doesn’t exist, the server responds with a 404 Not Found error.
In the golden days of yore, this was the only way content was served via HTTP.
In todays world we have dynamic systems, server-side web frameworks like Pyramid.
The requests that you send to a server are handled by a software process that assembles a response instead of looking up a physical location.
But we still have URLs, with protocol, domain and path.
What is the role for a path in a process that doesn’t refer to a physical file system?
Most web frameworks now call the path a route.
They provide a way of matching routes to the code that will be run to handle requests.
Routes in Pyramid
In Pyramid, routes are handled as configuration and are set up in the main
function in __init__.py:
# learning_journal/__init__.py
def main(global_config, **settings):
    # ...
    config.add_route('home', '/')
    # ...
Our code template created a sample route for us, using the add_route
method of the Configurator class.
The add_route method has two required arguments: a name and a
pattern
In our sample route, the name is 'home'
In our sample route, the pattern is '/'
When a request comes in to a Pyramid application, the framework looks at all the routes that have been configured.
One by one, in order, it tries to match the path of the incoming request against the pattern of the route.
As soon as a pattern matches the path from the incoming request, that route is used and no further matching is performed.
If no route is found that matches, then the request will automatically get a 404 Not Found error response.
In our sample app, we have one sample route named 'home', with a
pattern of /.
This means that any request that comes in for / will be matched to this
route, and any other request will be 404.
In a very real sense, the routes defined in an application are the public API.
Any route that is present represents something the user can do.
Any route that is not present is something the user cannot do.
You can use the proper definition of routes to help conceptualize what your app will do.
What routes might we want for a learning journal application?
What will our application do?
Let’s add routes for our application.
Open learning_journal/__init__.py.
For our list page, the existing 'home' route will do fine, leave it.
Add the following two routes:
config.add_route('home', '/') # already there
config.add_route('detail', '/journal/{id:\d+}')
config.add_route('action', '/journal/{action}')
The 'detail' route will serve a single journal entry, identified by an
id.
The action route will serve create and edit views, depending on
the action specified.
In both cases, we want to capture a portion of the matched path to use information it provides.
In a pattern, you can capture a path segment replacement
marker, a valid Python symbol surrounded by curly braces:
/home/{foo}/
If you want to match a particular pattern, like digits only, add a regular expression:
/journal/{id:\d+}
Matched path segments are captured in a matchdict:
# pattern          # actual url   # matchdict
/journal/{id:\d+}  /journal/27    {'id': '27'}
The matchdict is made available as an attribute of the request object
(more on that soon)
In Pyramid, a route is connected by configuration to a view.
In our app, a sample view has been created for us, in views.py:
@view_config(route_name='home', renderer='templates/mytemplate.pt')
def my_view(request):
    # ...
The order in which routes are configured is important, so that must be
done in __init__.py.
The order in which views are connected to routes is not important, so the
declarative @view_config decorator can be used.
When config.scan is called, all files in our application are searched
for such declarative configuration and it is added.
The Pyramid View
Let’s imagine that a request has come to our application for the path
'/'.
The framework made a match of that path to a route with the pattern '/'.
Configuration connected that route to a view in our application.
Now, the view that was connected will be called, which brings us to the nature of views
–A Pyramid view is a callable that takes request as an argument–
Remember what a callable is?
So, a view is a callable that takes the request as an argument.
It can then use information from that request to build appropriate data, perhaps using the application’s models.
Then, it returns the data it assembled, passing it on to a renderer.
Which renderer to use is determined, again, by configuration:
@view_config(route_name='home', renderer='templates/mytemplate.pt')
def my_view(request):
    # ...
More about this in a moment.
The view stands at the intersection of input data, the application model and renderers that offer rendering of the results.
It is the Controller in our MVC application.
Add temporary views to our application in views.py (and comment out the
sample view):
@view_config(route_name='home', renderer='string')
def index_page(request):
    return 'list page'

@view_config(route_name='detail', renderer='string')
def view(request):
    return 'detail page'

@view_config(route_name='action', match_param='action=create', renderer='string')
def create(request):
    return 'create page'

@view_config(route_name='action', match_param='action=edit', renderer='string')
def update(request):
    return 'edit page'
Now we can verify that our view configuration has worked.
Make sure your virtualenv is properly activated, and start the web server:
(ljenv)$ pserve development.ini
Starting server in PID 84467.
serving on http://0.0.0.0:6543
Then try viewing some of the expected application urls:
- http://localhost:6543/
- http://localhost:6543/journal/1
- http://localhost:6543/journal/create
- http://localhost:6543/journal/edit
What happens if you visit a URL that isn’t in our configuration?
Now that we’ve got temporary views that work, we can fix them to get information from our database
We’ll begin with the list view.
We need some code that will fetch all the journal entries we’ve written, in reverse order, and hand that collection back for rendering.
from .models import (
    DBSession,
    MyModel,
    Entry, # <- Add this import
)

# and update this view function
def index_page(request):
    entries = Entry.all()
    return {'entries': entries}
Next, we want to write the view for a single entry.
We’ll need to use the id value our route captures into the
matchdict.
Remember that the matchdict is an attribute of the request.
We’ll get the id from there, and use it to get the correct entry.
# add this import at the top
from pyramid.httpexceptions import HTTPNotFound

# and update this view function:
def view(request):
    this_id = request.matchdict.get('id', -1)
    entry = Entry.by_id(this_id)
    if not entry:
        return HTTPNotFound()
    return {'entry': entry}
We can now verify that these views work correctly.
Make sure your virtualenv is properly activated, and start the web server:
(ljenv)$ pserve development.ini
Starting server in PID 84467.
serving on http://0.0.0.0:6543
Then try viewing the list page and an entry page:
What happens when you request an entry with an id that isn’t in the database?
The MVC View
Again, back to the Model-View-Controller pattern.
By Alan Evangelista (Own work) [CC0], via Wikimedia Commons
We’ve built a model and we’ve created some controllers that use it.
In Pyramid, we call controllers views and they are callables that take request as an argument.
Let’s turn to the last piece of the MVC patter, the view
Presenting Data
The job of the view in the MVC pattern is to present data in a format that is readable to the user of the system.
There are many ways to present data.
Some are readable by humans (tables, charts, graphs, HTML pages, text files).
Some are more for machines (xml files, csv, json).
Which of these formats is the right one depends on your purpose.
What is the purpose of our learning journal?
Pyramid Renderers
In Pyramid, the job of presenting data is performed by a renderer.
So we can consider the Pyramid renderer to be the view in our MVC app.
We’ve already seen how we can connect a renderer to a Pyramid view with configuration.
In fact, we have already done so, using a built-in renderer called
'string'.
This renderer converts the return value of its view to a string and sends that back to the client as an HTTP response.
But the result isn’t so nice looking.
The built-in renderers ('string', 'json', 'jsonp') in Pyramid are
not the only ones available.
There are add-ons to Pyramid that support using various template languages as renderers.
In fact, one of these was installed by default when you created this project.
# in setup.py
requires = [
    # ...
    'pyramid_chameleon',
    # ...
]

# in learning_journal/__init__.py
def main(global_config, **settings):
    # ...
    config.include('pyramid_chameleon')
The pyramid_chameleon package supports using the chameleon template language.
The language is quite nice and powerful, but not so easy to learn.
Let’s use a different one, jinja2
Change pyramid_chameleon to pyramid_jinja2 in both of these files:
# in setup.py
requires = [
    # ...
    'pyramid_jinja2',
    # ...
]

# in learning_journal/__init__.py
def main(global_config, **settings):
    # ...
    config.include('pyramid_jinja2')
We’ve changed the dependencies for our Pyramid project.
As a result, we will need to re-install it so the new dependencies are also installed:
(ljenv)$ python setup.py develop
...
Finished processing dependencies for learning-journal==0.0
(ljenv)$
Now, we can use Jinja2 templates in our project.
Let’s learn a bit about how Jinja2 templates work.
Jinja2 Template Basics
We’ll start with the absolute basics.
Fire up an iPython interpreter, using your ljenv virtualenv:
(ljenv)$ ipython
...
In [1]:
Then import the Template class from the jinja2 package:
In [1]: from jinja2 import Template
A template is constructed with a simple string:
In [2]: t1 = Template("Hello {{ name }}, how are you")
Here, we’ve simply typed the string directly, but it is more common to build a template from the contents of a file.
Notice that our string has some odd stuff in it: {{ name }}.
This is called a placeholder and when the template is rendered it is replaced.
Call the render method, providing context:
In [3]: t1.render(name="Freddy")
Out[3]: 'Hello Freddy, how are you'
In [4]: t1.render(name="Gloria")
Out[4]: 'Hello Gloria, how are you'
Context can either be keyword arguments, or a dictionary
Note the resemblance to something you’ve seen before:
>>> "This is {owner}'s string".format(owner="Cris")
'This is Cris's string'
Dictionaries passed in as part of the context can be addressed with either subscript or dotted notation:
In [5]: person = {'first_name': 'Frank',
   ...:           'last_name': 'Herbert'}
In [6]: t2 = Template("{{ person.last_name }}, {{ person['first_name'] }}")
In [7]: t2.render(person=person)
Out[7]: 'Herbert, Frank'
- Jinja2 will try the correct way first (attr for dotted, item for subscript).
- If nothing is found, it will try the opposite.
- If nothing is found, it will return an undefined object.
The exact same is true of objects passed in as part of context:
In [8]: t3 = Template("{{ obj.x }} + {{ obj['y'] }} = Fun!")
In [9]: class Game(object):
   ...:     x = 'babies'
   ...:     y = 'bubbles'
   ...:
In [10]: bathtime = Game()
In [11]: t3.render(obj=bathtime)
Out[11]: 'babies + bubbles = Fun!'
This means your templates can be agnostic as to the nature of the things found in context
You can apply filters to the data passed in context with the pipe (‘|’) operator:
In [12]: t4 = Template("shouted: {{ phrase|upper }}")
In [13]: t4.render(phrase="this is very important")
Out[13]: 'shouted: THIS IS VERY IMPORTANT'
You can also chain filters together:
In [14]: t5 = Template("confusing: {{ phrase|upper|reverse }}")
In [15]: t5.render(phrase="howdy doody")
Out[15]: 'confusing: YDOOD YDWOH'
Logical control structures are also available:
In [16]: tmpl = """
   ....: {% for item in list %}{{ item}}, {% endfor %}
   ....: """
In [17]: t6 = Template(tmpl)
In [18]: t6.render(list=['a', 'b', 'c', 'd', 'e'])
Out[18]: '\na, b, c, d, e, '
Any control structure introduced in a template must be paired with an
explicit closing tag ({% for %}...{% endfor %})
Remember, although template tags like {% for %} or {% if %} look a
lot like Python, they are not.
The syntax is specific and must be followed correctly.
There are a number of specialized tests available for use with the
if...elif...else control structure:
In [19]: tmpl = """
   ....: {% if phrase is upper %}
   ....:   {{ phrase|lower }}
   ....: {% elif phrase is lower %}
   ....:   {{ phrase|upper }}
   ....: {% else %}{{ phrase }}{% endif %}"""
In [20]: t7 = Template(tmpl)
In [21]: t7.render(phrase="FOO")
Out[21]: '\n\n  foo\n'
In [22]: t7.render(phrase='bar')
Out[22]: '\n\n  BAR\n'
In [23]: t7.render(phrase='This should print as-is')
Out[23]: '\nThis should print as-is'
Basic Python-like expressions are also supported:
In [24]: tmpl = """
   ....: {% set sum = 0 %}
   ....: {% for val in values %}
   ....: {{ val }}: {{ sum + val }}
   ....:   {% set sum = sum + val %}
   ....: {% endfor %}
   ....: """
In [25]: t8 = Template(tmpl)
In [26]: t8.render(values=range(1, 11))
Out[26]: '\n\n\n1: 1\n  \n\n2: 3\n  \n\n3: 6\n  \n\n4: 10\n
          \n\n5: 15\n  \n\n6: 21\n  \n\n7: 28\n  \n\n8: 36\n
          \n\n9: 45\n  \n\n10: 55\n  \n\n'
Our Templates
There’s more that Jinja2 templates can do, but it will be easier to introduce you to that in the context of a working template. So let’s make some.
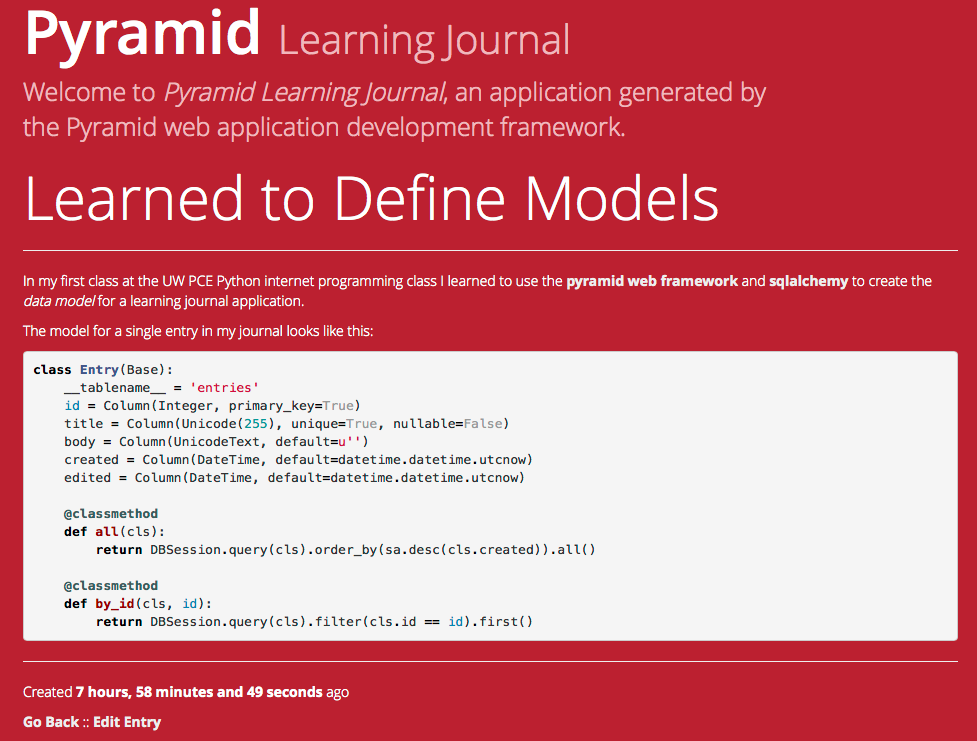
We have a Pyramid view that returns a single entry. Let’s create a template to show it.
In learning_journal/templates create a new file detail.jinja2:
<article>
  <h1>{{ entry.title }}</h1>
  <hr/>
  <p>{{ entry.body }}</p>
  <hr/>
  <p>Created <strong title="{{ entry.created }}">{{entry.created}}</strong></p>
</article>
Then wire it up to the detail view in views.py:
# views.py
@view_config(route_name='detail', renderer='templates/detail.jinja2')
def view(request):
    # ...
Now we should be able to see some rendered HTML for our journal entry details.
Start up your server:
(ljenv)$ pserve development.ini
Starting server in PID 90536.
serving on http://0.0.0.0:6543
Then try viewing an individual journal entry
The index page of our journal should show a list of journal entries, let’s do that next.
In learning_journal/templates create a new file list.jinja2:
{% if entries %}
<h2>Journal Entries</h2>
<ul>
  {% for entry in entries %}
    <li>
    <a href="{{ request.route_url('detail', id=entry.id) }}">{{ entry.title }}</a>
    </li>
  {% endfor %}
</ul>
{% else %}
<p>This journal is empty</p>
{% endif %}
It’s worth taking a look at a few specifics of this template.
{% for entry in entries %}
 ...
{% endfor %}
Jinja2 templates are rendered with a context.
A Pyramid view returns a dictionary, which is passed to the renderer as part of of that context
This means we can access values we return from our view in the renderer using the names we assigned to them.
It’s worth taking a look at a few specifics of this template.
<a href="{{ request.route_url('detail', id=entry.id) }}">{{ entry.title }}</a>The request object is also placed in the context by Pyramid.
Request has a method
route_urlthat will create a URL for a named route.This allows you to include URLs in your template without needing to know exactly what they will be.
This process is called reversing, since it’s a bit like a reverse phone book lookup.
Finally, you’ll need to connect this new renderer to your listing view:
@view_config(route_name='home', renderer='templates/list.jinja2')
def index_page(request):
    # ...
We can now see our list page too. Let’s try starting the server:
(ljenv)$ pserve development.ini
Starting server in PID 90536.
serving on http://0.0.0.0:6543
Then try viewing the home page of your journal:
Click on the link to an entry, it should work.
These views are reasonable, if quite plain.
It’d be nice to put them into something that looks a bit more like a website.
Jinja2 allows you to combine templates using something called template inheritance.
You can create a basic page structure, and then inherit that structure in other templates.
In our class resources I’ve added a page template layout.jinja2. Copy
that page to your templates directory
<!DOCTYPE html>
<html lang="en">
  <head>
    <meta charset="utf-8">
    <title>Python Learning Journal</title>
    <!--[if lt IE 9]><script src="http://html5shiv.googlecode.com/svn/trunk/html5.js"></script><![endif]-->
  </head>
  <body>
    <header>
      <nav><ul><li><a href="{{ request.route_url('home') }}">Home</a></li></ul></nav>
    </header>
    <main>
      <h1>My Python Journal</h1>
      <section id="content">{% block body %}{% endblock %}</section>
    </main>
    <footer><p>Created in the UW PCE Python Certificate Program</p></footer>
  </body>
</html>
The important part here is the {% block body %}{% endblock %} expression.
This is a template block and it is a kind of placeholder.
Other templates can inherit from this one, and fill that block with additional HTML.
Let’s update our detail and list templates:
{% extends "layout.jinja2" %}
{% block body %}
<!-- everything else that was already there goes here -->
{% endblock %}
Let’s try starting the server so we can see the result:
(ljenv)$ pserve development.ini
Starting server in PID 90536.
serving on http://0.0.0.0:6543
Then try viewing the home page of your journal:
Click on the link to an entry, it should work.
And now you have shared page structure that is in both.
Static Assets
Although we have a shared structure, it isn’t particularly nice to look at.
Aspects of how a website looks are controlled by CSS (Cascading Style Sheets).
Stylesheets are one of what we generally speak of as static assets.
Other static assets include images that are part of the look and feel of the site (logos, button images, etc) and the JavaScript files that add client-side dynamic behavior to the site.
Serving static assets in Pyramid requires a static view to configuration.
Luckily, pcreate already handled that for us:
# in learning_journal/__init__.py
def main(global_config, **settings):
    # ...
    config.add_static_view('static', 'static', cache_max_age=3600)
    # ...
The first argument to add_static_view is a name that will need to
appear in the path of URLs requesting assets.
The second argument is a path that is relative to the package being configured.
Assets referenced by the name in a URL will be searched for in the location defined by the path
Additional keyword arguments control other aspects of how the view works.
Once you have a static view configured, you can use assets in that location in templates.
The request object in Pyramid provides a static_path method that
will render an appropriate asset path for us.
Add the following to our layout.jinja2 template:
<head>
  <!-- ... -->
  <link href="{{ request.static_path('learning_journal:static/styles.css') }}" rel="stylesheet">
</head>
The one required argument to request.static_path is a path to an
asset.
Note that because any package might define a static view, we have to specify which package we want to look in.
That’s why we have learning_journal:static/styles.css in our call.
I’ve created some very very basic styles for our learning journal.
You can find them in resources/session06/styles.css. Go ahead and copy
that file.
Add it to learning_journal/static.
Then restart your web server and see what a difference a little style makes:
(ljenv)$ pserve development.ini
Starting server in PID 90536.
serving on http://0.0.0.0:6543
Your site should look something like this:
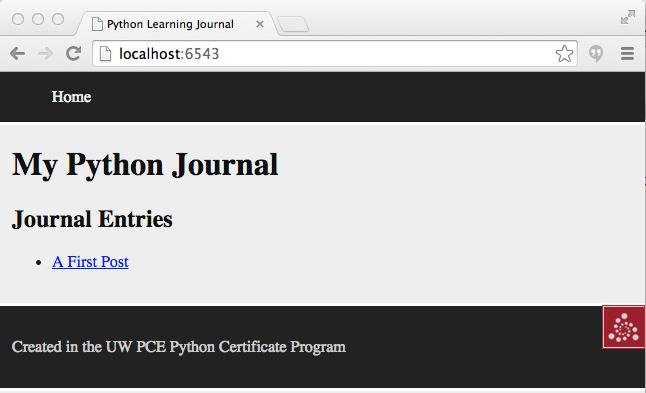
The learning journal with basic styles applied
Getting Interactive
We have a site that allows us to view a list of journal entries.
We can also view the details of a single entry.
But as yet, we don’t really have any interaction in our site yet.
We can’t create new entries.
Let’s add that functionality next.
User Input
In HTML websites, the traditional way of getting input from users is via HTML forms.
Forms use input elements to allow users to enter data, pick from drop-down lists, or choose items via checkbox or radio button.
It is possible to create plain HTML forms in templates and use them with Pyramid.
It’s a lot easier, however, to work with a form library to create forms, render them in templates and interact with data sent by a client.
We’ll be using a form library called WTForms in our project
The first step to working with this library is to install it.
Start by makin the library as a dependency of our package by adding it to
the requires list in setup.py:
requires = [
    # ...
    'wtforms', # <- add this to the list
]
Then, re-install our package to download and install the new dependency:
(ljenv)$ python setup.py develop
...
Finished processing dependencies for learning-journal==0.0
Using WTForms
We’ll want a form to allow a user to create a new Journal Entry.
Add a new file called forms.py in our learning_journal package, next to
models.py:
from wtforms import Form, TextField, TextAreaField, validators

strip_filter = lambda x: x.strip() if x else None

class EntryCreateForm(Form):
    title = TextField(
        'Entry title',
        [validators.Length(min=1, max=255)],
        filters=[strip_filter])
    body = TextAreaField(
        'Entry body',
        [validators.Length(min=1)],
        filters=[strip_filter])
Next, we need to add a new view that uses this form to create a new entry.
Add this to views.py:
# add these imports
from pyramid.httpexceptions import HTTPFound
from .forms import EntryCreateForm

# and update this view function
def create(request):
    entry = Entry()
    form = EntryCreateForm(request.POST)
    if request.method == 'POST' and form.validate():
        form.populate_obj(entry)
        DBSession.add(entry)
        return HTTPFound(location=request.route_url('home'))
    return {'form': form, 'action': request.matchdict.get('action')}
We already have a route that connects here. Let’s test it.
Start your server:
(ljenv)$ pserve development.ini
Starting server in PID 90536.
serving on http://0.0.0.0:6543
And then try connecting to the action route:
You should see something like this:
{'action': u'create', 'form': <learning_journal.forms.EntryCreateForm object at 0x10e7d6b90>}
Finally, we need to create a template that will render our form.
Add a new template called edit.jinja2 in
learning_journal/templates:
{% extends "templates/layout.jinja2" %}
{% block body %}
<form action="." method="POST">
{% for field in form %}
  {% if field.errors %}
    <ul>
    {% for error in field.errors %}
        <li>{{ error }}</li>
    {% endfor %}
    </ul>
  {% endif %}
    <p>{{ field.label }}: {{ field }}</p>
{% endfor %}
    <p><input type="submit" name="submit" value="Submit" /></p>
</form>
{% endblock %}
You’ll need to update the view configuration to use this new renderer.
Update the configuration in learning_journal/views.py:
@view_config(route_name='action', match_param='action=create',
             renderer='templates/edit.jinja2')
def create(request):
    # ...
And then you should be able to start your server and test:
(ljenv)$ pserve development.ini
Starting server in PID 90536.
serving on http://0.0.0.0:6543
Great! Now you can add new entries to your journal.
But in order to do so, you have to hand-enter the url.
You should add a new link in the UI somewhere that helps you get there more easily.
Add the following to list.jinja2:
{% extends "layout.jinja2" %}
{% block body %}
{% if entries %}
...
{% else %}
...
{% endif %}
<!-- Add This Link -->
<p><a href="{{ request.route_url('action', action='create') }}">New Entry</a></p>
{% endblock %}
Homework
You have a website now that allows you to create, view and list journal entries
However, there are still a few flaws in this system.
You should be able to edit a journal entry that already exists, in case you make a spelling error.
It would also be nice to see a prettier site.
Let’s handle that for homework this week.
Part 1: Add Editing
For part one of your assignment, add editing of existing entries. You will need:
- A form that shows an existing entry (what is different about this form from one for creating a new entry?)
- A pyramid view that handles that form. It should:
- Show the form with the requested entry when the page is first loaded
- Accept edits only on POST
- Update an existing entry with new data from the form
- Show the view of the entry after editing so that the user can see the edits saved correctly
- Show errors from form validation, if any are present
- A link somewhere that leads to the editing page for a single entry (probably on the view page for a entry)
You’ll need to update a bit of configuration, but not much. Use the create form we did here in class as an example.
Part 2: Make it Yours
I’ve created for you a very bare-bones layout and stylesheet.
You will certainly want to add a bit of your own style and panache.
Spend a few hours this week playing with the styles and getting a site that looks more like you want it to look.
The Mozilla Developer Network has some excellent resources for learning CSS.
In particular, the Getting Started with CSS tutorial is a thorough introduction to the basics.
You might also look at their CSS 3 Demos to help fire up your creative juices.
Here are a few more resources:
- A List Apart offers outstanding articles. Their Topics list is worth a browse.
- Smashing Magazine is another excellent resource for articles on design.
Part 3: User Model
As it stands, our journal accepts entries from anyone who comes by.
Next week we will add security to allow only logged-in users to create and edit entries.
To do so, we’ll need a user model
The model should have:
- An
idfield that is a primary key - A
usernamefield that is unicode, no more than 255 characters, not nullable, unique and indexed. - A
passwordfield that is unicode and not nullable
In addition, the model should have a classmethod that retrieves a specific user when given a username.
Part 4: Preparation for Deployment
At the end of class next week we will be deploying our application to Heroku.
You will need to get a free account.
Once you have your free account set up and you have logged in, run through the getting started with Python tutorial.
Be sure to at least complete the set up step. It will have you install the Heroku Toolbelt, which you will need to have ready in class.
Submitting Your Work
As usual, submit your work by committing and pushing it to your project github repository
Commit early and commit often.
Write yourself good commit messages explaining what you have done and why.
When you are ready to have your work reviewed, email the link to your repository to us, we’ll take a look and make comments.